The Independent's journalism is supported by our readers. When you purchase through links on our site, we may earn commission.
Three recipes that definitively prove gluten-free food isn’t bland or boring
If you want something done properly, you go to an expert, right? Well, Becky Excell is the undisputable authority on great tasting gluten-free food – just ask Nigella. But in case you don’t have her on speed dial, here’s three of my favourite recipes from her upcoming book, says Hannah Twiggs
Sign up to IndyEat's free newsletter for weekly recipes, foodie features and cookbook releases
Get our food and drink newsletter for free
According to Nigella Lawson, Becky Excell is the “queen of gluten-free”. Who could argue with that?!
Her first book, How to Make Anything Gluten Free, released in February, has sold over 50,000 copies, and her second, How to Bake Anything Gluten Free, (wait... I sense a theme here) is due in September and has already topped Amazon’s bestsellers list, five months before it’s even been published.
Since she started posting her most-missed meals on her blog 10 years ago, her fan base has grown exponentially thanks to her easy recipes, tips and tricks for how to unlock all the things you could never ordinarily eat on a gluten-free diet.
Coeliac Awareness Week aims to shine a light on the condition, which causes the body’s immune system to attack its own tissue after consuming gluten. Symptoms can be worrisome and embarrassing and can leave people living with the condition feeling isolated – something none of us need more of right now.
So whether you’re a long-time coeliac or are about to embark on a gluten-free lifestyle for the first time – whatever the reason – here’s three recipes to show you that gluten-free is far from bland and boring.
Read our interview with Becky Excell here
Two-ingredients arepas
I had my first arepa at a food market in London and I’m now addicted to making them at home. You essentially use them like a taco, but they’re not only crisp on the outside, they’re soft and fluffy in the middle and have a wonderful flavour. Cut each one in half and fill with all your favourite Mexican-style fillings. You can easily order pre-cooked cornmeal online and, trust me, you’ll be glad you did!
Makes: 8 servings
Time: 20 mins
Ingredients
300g pre-cooked cornmeal flour (yellow or white)
1 tsp salt
500ml warm water
Vegetable oil, for cooking
Method
In a large mixing bowl, combine the cornmeal flour and salt. Add the warm water, mix and then use your hands to bring it together into a ball. Allow to rest for 5 minutes.
Briefly knead the dough in the bowl until you achieve a smooth consistency. Dough too wet? Add a little more cornmeal. Dough too dry? Add a little more water.
Divide the dough into 8 portions and roll into large golf balls, around 100g each. One at a time, flatten the balls using your hands to form a flat disc just over 1cm thick and around 10cm in diameter. Make sure you don’t leave lots of finger indentations in the dough as they won’t cook evenly in the pan.
Place a large pan over a medium heat and cover the base with vegetable oil. Once heated, place as many dough discs as will comfortably fit into your pan. Cook for 5 minutes on each side until golden brown. Allow to drain on some kitchen paper and pat dry, then cool for 15 minutes. Repeat until you’ve used up all your dough.
Slice just over halfway through each arepa with a serrated knife and fill with your favourite Mexican-style fillings. I’d recommend guacamole, fresh salsa and my one-pot pulled pork.
Store the unfilled arepas in the fridge for up to 5 days and simply bake in the oven to refresh them before enjoying.
Tip: Don’t try this with any other flour, like cornflour (cornstarch); it must be pre-cooked cornmeal flour or it won’t work! Please note that pre-cooked cornmeal is different to masa harina flour used in my corn tortilla wraps.
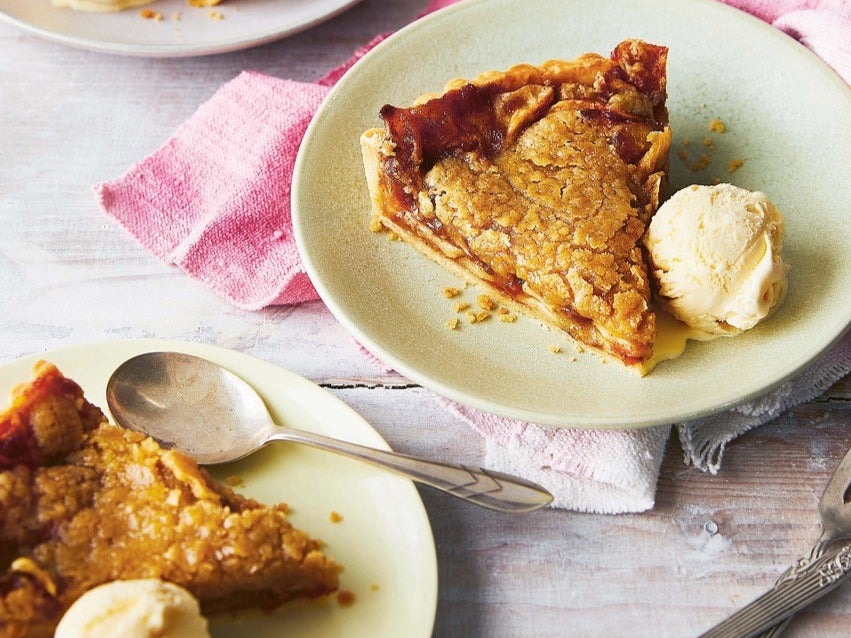
Apple crumble pie
I decided to combine my two favourite desserts for this one: an apple pie and an apple crumble. And I’m so glad I did! With buttery pastry, tons of sticky, thinly sliced apple, topped with a crispy, crunchy, crumble topping, this pie is almost too good to share.
Makes: 8-10 servings
Time: 1 hr
Ingredients
1 quantity of gluten-free shortcrust pastry (see below), chilled for 25 minutes
Gluten-free plain (all-purpose) flour, for dusting
For the filling:
80g/6½ tbsp light brown sugar
15g/1 tbsp butter
600g Bramley apples, peeled, cored and sliced into short 5mm slices
1 tsp ground cinnamon
2 tsp lemon juice
2 tbsp cornflour (cornstarch)
For the crumble topping:
85g/7 tbsp light brown sugar
100g gluten-free plain (all-purpose) flour
1 tsp vanilla extract
85g butter, melted and cooled
Method
Remove your chilled pastry from the fridge. If it feels really firm when you take it out, leave it out at room temperature briefly before rolling it. Don’t handle your dough excessively as this will warm it up and make it more fragile.
Lightly flour your rolling pin. On a sheet of non-stick baking parchment, roll out the pastry into a large circle, 3mm thick.
Transfer to a 23cm fluted tart tin, by supporting the pastry as you gently invert it into the tin, with equal overhang on all sides.
Peel off the baking parchment. Next, use your fingers to carefully ease the pastry into place so that it neatly lines the tin. Lift the overhanging pastry and, using your thumb, squash 2mm of pastry back into the tin. This will result in slightly thicker sides, which will prevent your pastry case from shrinking when baked. Allow the overhang to do its thing – we’ll trim the overhang after chilling it.
Lightly prick the base of the pastry case with a fork, then place it in the fridge for 15 minutes. Preheat the oven to 180C fan/200C/400F and place a baking tray inside to heat up.
After chilling, use a rolling pin to roll over the top of the tin, removing the overhang and flattening down the pastry. Loosely line the base of the pastry case with baking parchment and fill with baking beans (or uncooked rice if you don’t have any).
Bake in the oven on the heated tray for 15 minutes, then remove the parchment and beans and bake for a further 5 minutes. Remove from the oven and allow to fully cool.
Next, prepare your crumble topping. In a bowl, mix your sugar, flour, vanilla and cooled melted butter together until well combined, then chill in the fridge until needed.
Now prepare your pie filling. Place a large saucepan over a low heat and add your brown sugar and butter. Allow to fully melt before adding your apples, cinnamon and lemon juice. Mix to coat the apples and gently simmer until some of the juices begin to appear. Sift in your cornflour and immediately mix to ensure it doesn’t go lumpy. Continue to cook your apples until the juices thicken and the apples are ever so slightly softened. You don’t want them to be mushy! Remove from the heat and allow to cool slightly.
To construct the pie, spoon your apple filling into the pastry case. There shouldn’t be any thin juices, just the thickened juices as a result of the cornflour. Sprinkle chunks of the chilled crumble all over the top of the apples. Bake in the oven for 30 minutes or until the crumble top is golden.
Serve with vanilla ice cream or thick custard.
Tip: If you don’t have time to make your own pastry, use store-bought gluten-free pastry instead.
Shortcrust pastry
Makes: Enough to line a 23cm pie dish
Time: 15 mins + 25 mins chilling
Ingredients
200g gluten-free plain (all-purpose) flour
1 tsp xanthan gum
100g very cold butter, cut into 1cm cubes
30g/2½ tbsp caster (superfine) sugar (if making a sweet pastry case)
1 large egg, beaten
3-5 tsp cold water
Method
In a large mixing bowl, mix together your flour and xanthan gum.
Make sure your butter is really cold: if not, put it into the fridge or freezer until nicely chilled, then add to the bowl and mix it into the flour.
Using your fingertips, rub the butter into the flour to form a breadcrumb-like consistency.
Make sure your hands are cool as we want to avoid the butter getting warm! Stir in your sugar, if making sweet pastry. Add in your beaten egg and, using a knife, carefully cut it into the mixture. You don’t want it to come together just yet, so don’t use your hands to push it together, even if it feels like you could.
Add the cold water a teaspoon at a time, using your knife to cut it in.
The mixture will start to really come together at this point. I find that, at around 3 teaspoons, it’s about the right consistency to push together into a ball with my hands. It should be a little sticky to touch but not unmanageable.
Wrap the dough in cling film (plastic wrap) and leave to chill in the fridge for around 25 minutes before using.
You can freeze this pastry for up to 2 months; defrost fully before using.
Garlic and rosemary focaccia
Every time I take a bite of this focaccia, I absolutely cannot believe that it’s gluten-free, despite having made it myself! It’s light and fluffy in the middle with a soft crust, infused with tons of flavour thanks to the olive oil and finished with a hit of fresh rosemary and salt.
Makes: 4-5 servings
Time: 45 mins + 1 hr proving
Ingredients
280ml warm water
7g active dried yeast (ensure gluten-free)
15g/1 tbsp caster (superfine) sugar
260g gluten-free white bread flour or gluten-free plain (all-purpose) flour
2 tsp xanthan gum
15g psyllium husk powder (ensure gluten-free)
6g salt
1 large egg
1 tsp cider vinegar
60ml olive oil, plus extra for greasing
To finish:
Garlic-infused oil
Fresh rosemary sprigs
Maldon (flaky) sea salt
Method
Mix your warm water, yeast and sugar in a jug, then allow to stand for 10 minutes until nice and frothy.
In a large bowl or the bowl of a stand mixer, add your flour, xanthan gum, psyllium husk powder and salt.
Mix together until well combined, then add your egg, vinegar, oil and frothy yeast mixture to the dry ingredients.
Either in a stand mixer fitted with a beater attachment or with an electric hand whisk, mix on a high speed for 3 minutes until well combined. It should look like a very thick, sticky batter. Leave to rest for about 10 minutes.
Grease a 23cm square baking tin with a little oil, then add another glug of olive oil to lightly coat the base of the tin.
Tip your rested dough into the tin and spread out using lightly oiled hands and a spatula. It might seem a little resistant at first, but continue to spread it into a nice, even layer.
Loosely cover with cling film and prove in a warm place for 1 hour until noticeably risen.
Preheat your oven to 210C fan/230C/450F.
Using oiled fingers, make several deep dimples in the risen dough, then drizzle garlic-infused oil all over the top to fill the dimples.
Sprinkle with fresh rosemary and salt before cooking in the oven for 25-30 minutes until golden in colour.
Remove from the oven and carefully remove from the baking tin. Tap the base to check that it feels and sounds hollow – if so, then it’s done. Drizzle with some extra garlic-infused oil and place onto a wire rack to cool completely before slicing.
Tip: Feel free to add any extras to the top of your focaccia just before baking – olives and cherry tomatoes work especially well!
‘How to Bake Anything Gluten Free’ by Becky Excell (Quadrille, £20) is out 30 September 2021 available to preorder now.
Subscribe to Independent Premium to bookmark this article
Want to bookmark your favourite articles and stories to read or reference later? Start your Independent Premium subscription today.
Join our commenting forum
Join thought-provoking conversations, follow other Independent readers and see their replies